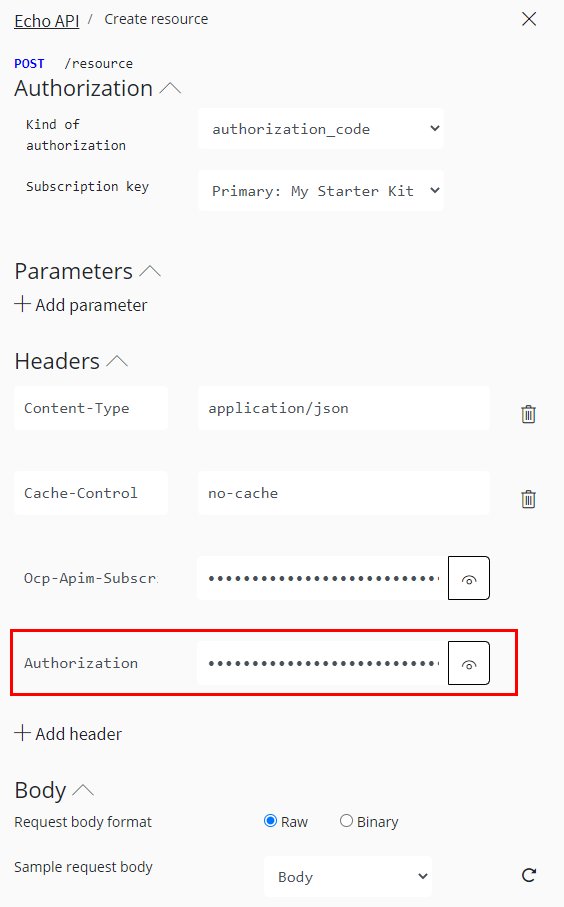
| 400 | invalid_request | The request is malformed, a required parameter is missing or a parameter has an invalid value | Check all your parameters and their spelling |
| unauthorized_client | The client is not authorized | Check your client_id parameter |
| access_denied | The resource owner denied the request for authorization | Check if your authentication information match with your Works With Legrand account |
| unsupported_response_type | Unsupported response type | Check your grant_type parameter |
| invalid_scope | The scope is malformed or invalid | If you defined custom scopes, check if they are valid or well spelled |
| server_error | The authorization server encountered an unexpected condition that prevented it from fulfilling the request. This error code is needed because a 500 Internal Server Error HTTP status code cannot be returned to the client by an HTTP redirect. | Check your parameters and the server status |
| temporarily_unavailable | The authorization server is not able to handle the request | Check the server status and your parameters |
| 401 | invalid_client | The client_id doesn’t exist | Check your client_id parameter |
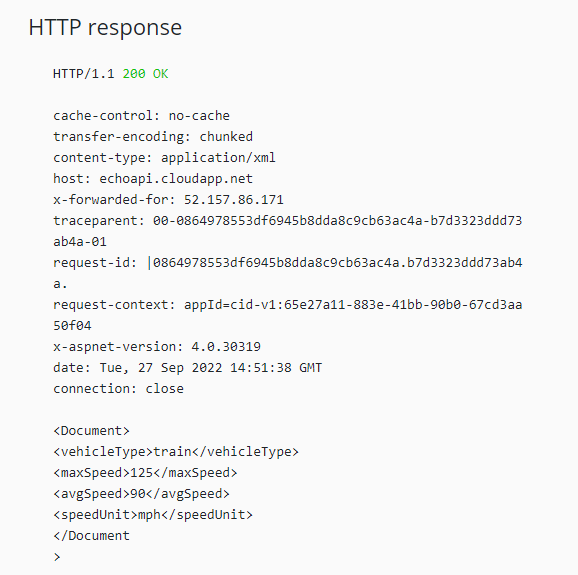
| 500 | server_error | An unexpected server error occured | Wait for the server to work again |
| / | Could not get any response | The server couldn’t send a response | Ensure that the server is working properly
Check if you misspelled the server URL |