wwl-nc

Getting started

To get started with Works with Legrand, follow this tutorial. After you complete this guide, you will have a Works with Legrand developer account (congratulation!) and you will be able to try our APIs included in the Starter Kit plan

Step 1 : Create an account

You must Sign-Up to create your account. Thanks to this account, you are now known as a developer within Works with Legrand portal. If you already have a developer account, you just have to Sign-In.

Nota

With this account, you will also be able to use ours (and yours) applications as an “end-user”, but if you already have an “end-user” account, you cannot use it to sign-in within Works with Legrand portal

Step 2 : Subscribe to a product and get subscription key

You need to subscribe to a product to use APIs. When you subscribe to a product, you can use APIs associated to the product.
Click in the menu on Documentation > Works with Legrand > LIST OF APIs > Subscriptions to see available products

For now, there is one product, Starter Kit, available for free. This product contains all APIs dedicated to third parties, with a limitation on 500 calls per day and per user. Let’s take a simple example: if 10 end-users are using your application to manage our products, each of them will have a quota of 500 calls per day.
When you click on the product’s name, you see the list of available APIs, and you can subscribe to the product.
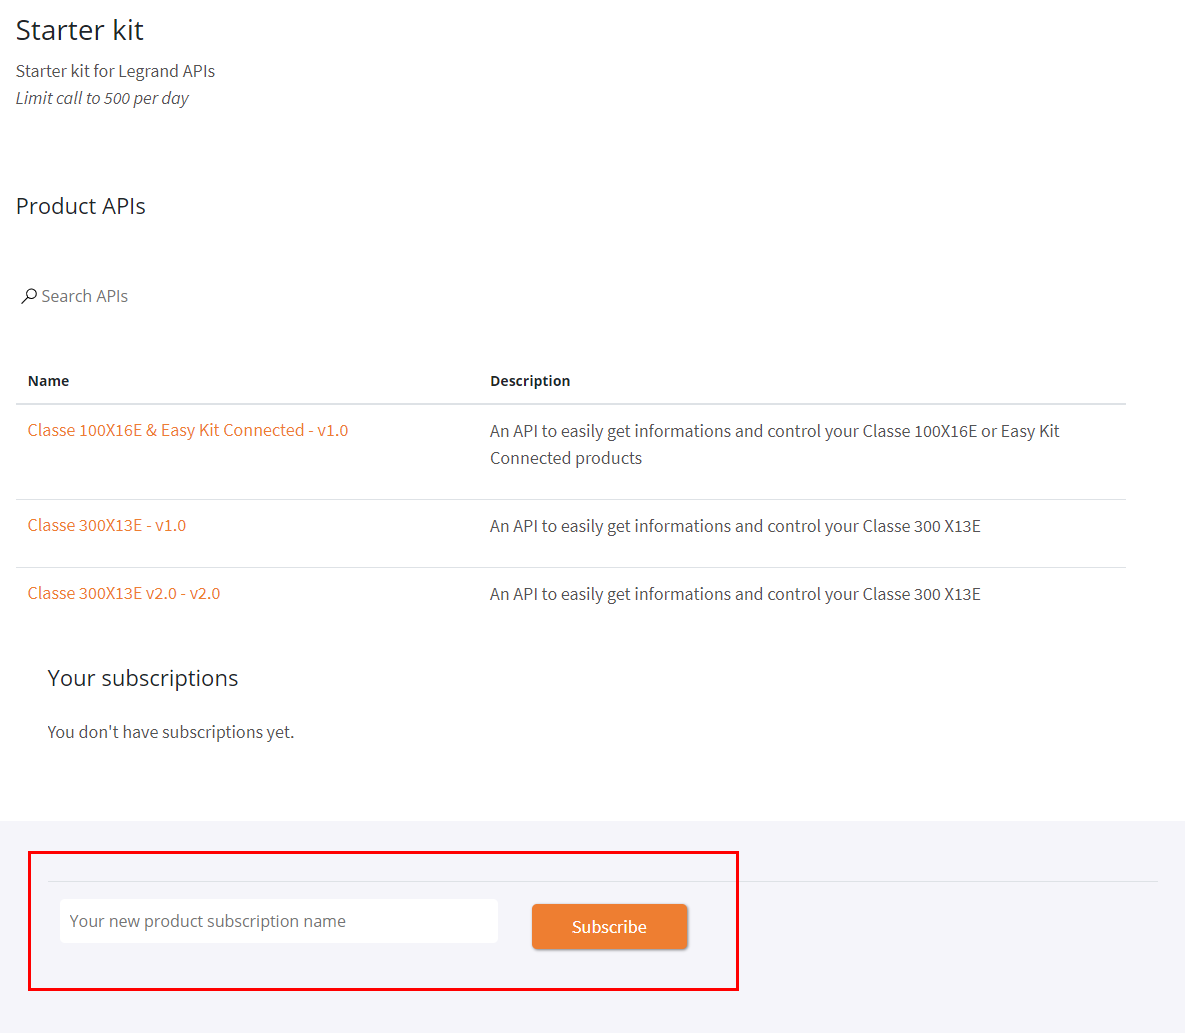
At the bottom of the page, give a name to your Subscription and click on “Subscribe” button. You are then redirected to your profile account page, where are listed all your subscriptions:
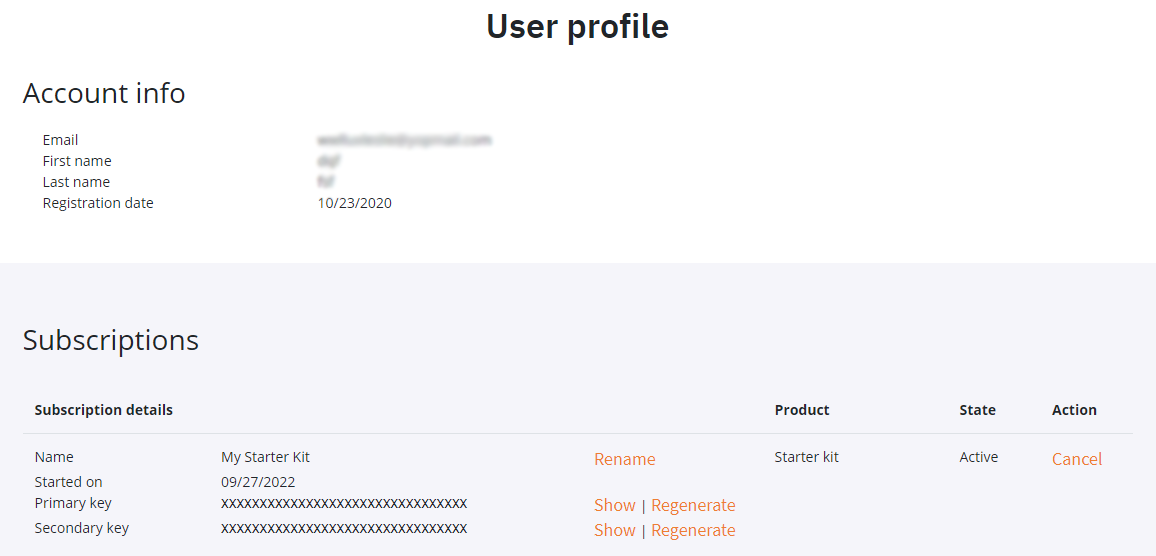
Primary key and Secondary key are unique per subscription and per account. You have to use it into your application to identify your subscription (Ocp-Apim-Subscription-Key parameter in the header of the HTML request).

Step 3 : Try-it!

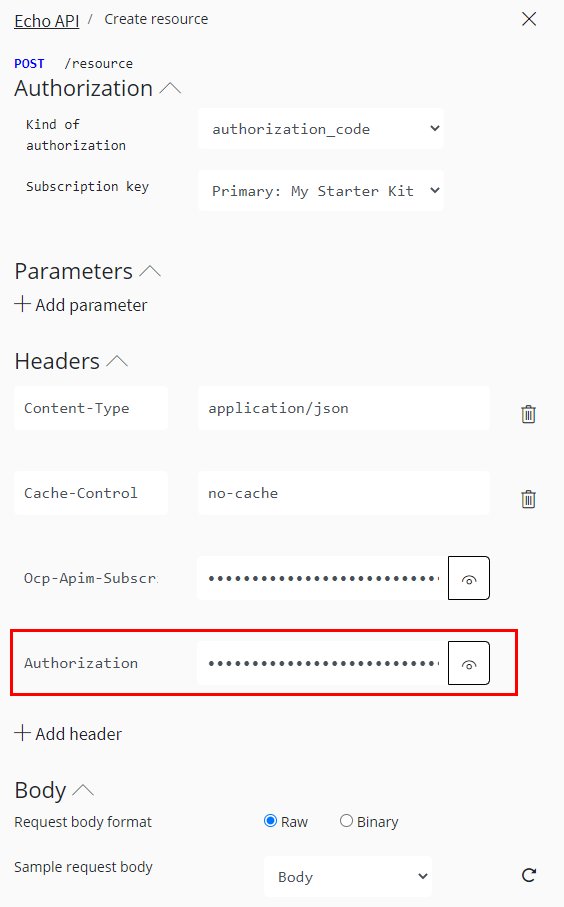
You can test the API directly within Works with Legrand portal. On the following example, we use the Echo API, a simple API dedicated to test, which does not need a real device to work. To proceed, choose the Create resource of Echo API and then click on Try it

Concerning this API, and also concerning all our APIs, there are 2 mandatory parameters to put in HTML header:

  • Ocp-Apim-Subscription-key is directly filled by the portal. It corresponds to the Primary key or the Secondary key of the Subscription linked to your account.
  • Kind of authorization is the token sent by the user manager service. To get it, select authorization_code in the Kind of authorization section:
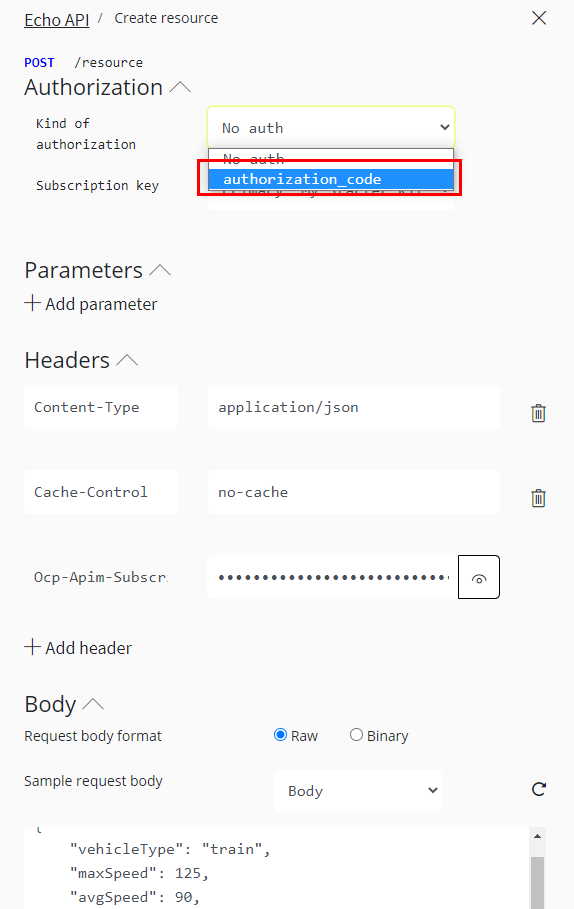
If you are not logged in, it opens a sign-in windows, where you must enter your credential linked to your LEGRAND account (developer or end-user account). It automatically fills the Authorization field in the header with the right token:
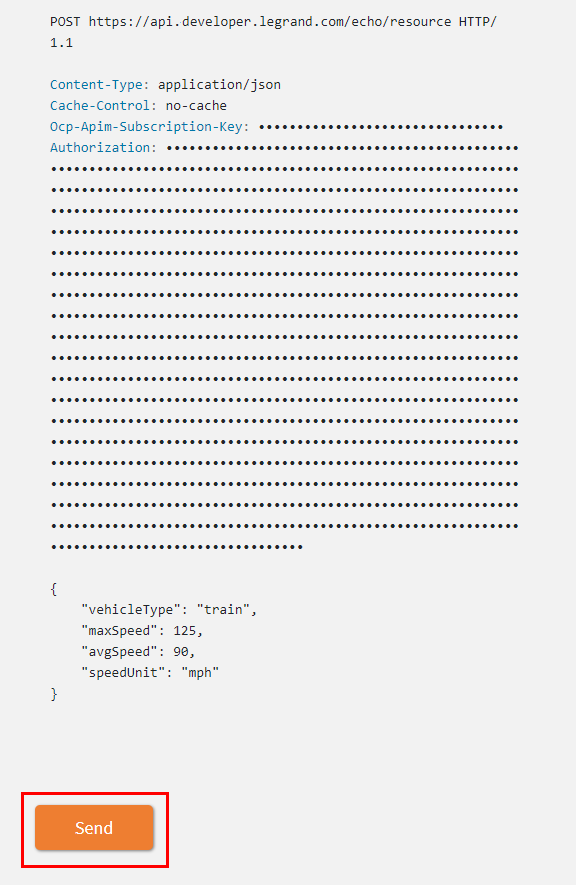
After that, you can send the message by clicking on Send at the bottom of the page:
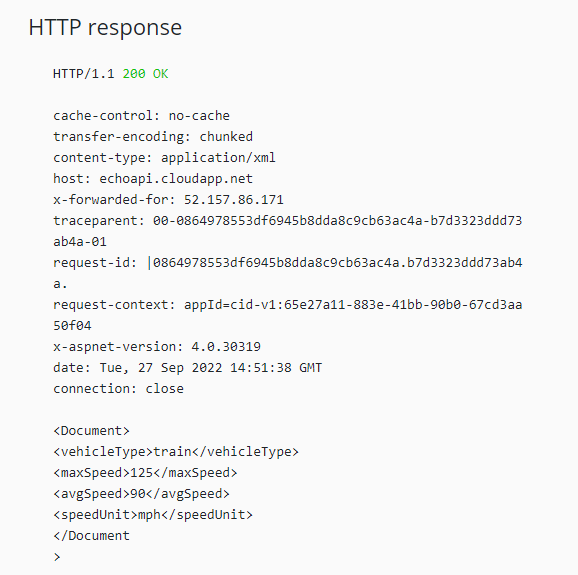
You will get the answer in the “HTTP response” area:
Create an application

To successfully create an application with Works with Legrand, follow this step-by-step tutorial. Before you begin, be sure to complete the Getting Started tutorial, where you’ll get your LEGRAND developer account, a subscription key, and learn how to explore APIs.

Step 1 : Register your application

To use our APIs, first register your application to obtain its unique set of credentials, which will be used by your users to enable your app to access their data. 1. Go to My Applications, a page dedicated to application management.

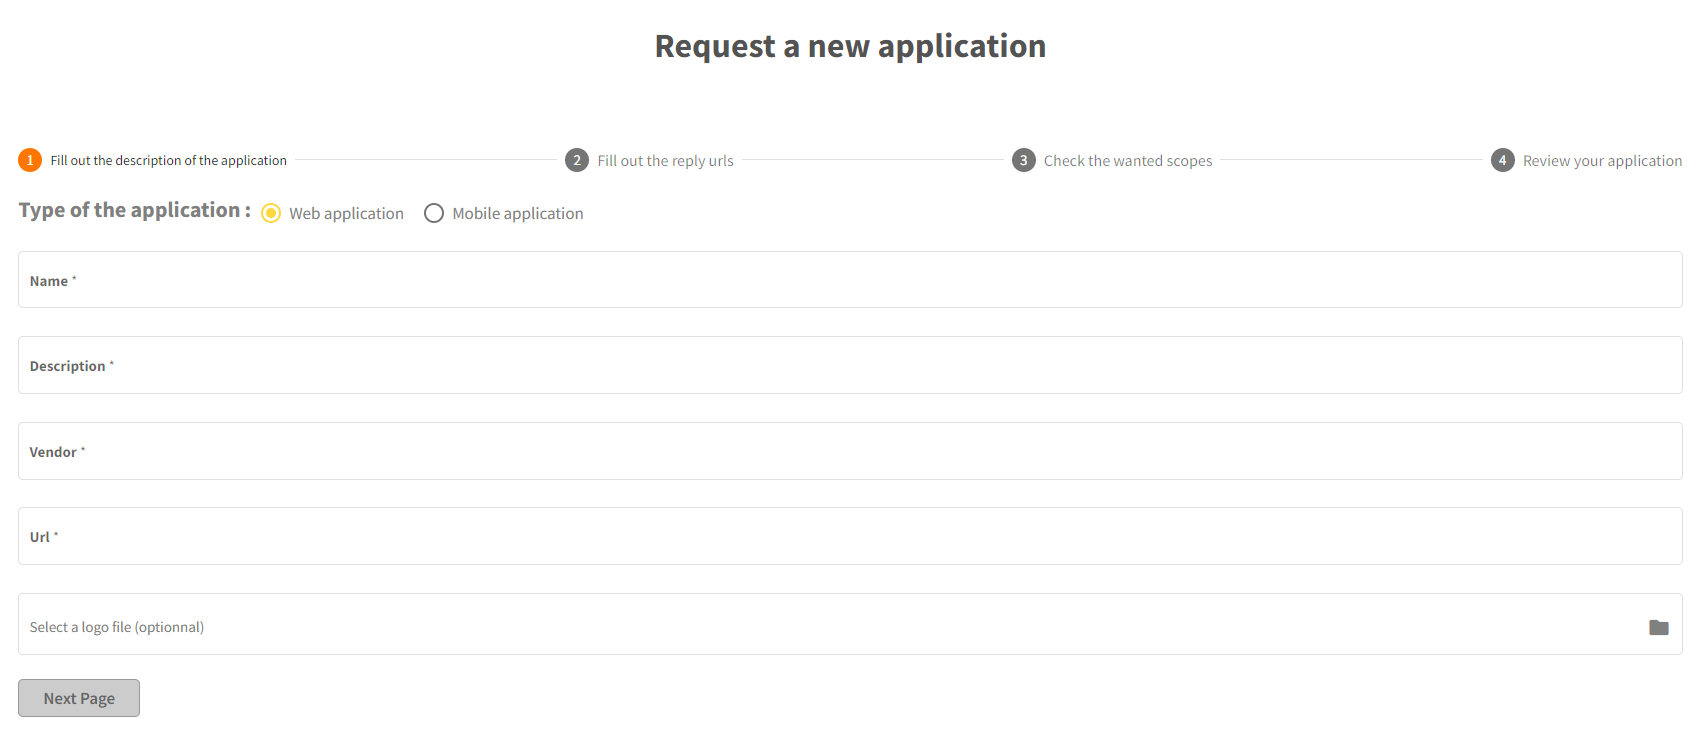
2. Then click on “Request New Application” and fill all followings fields:

Fields Name, Description, Vendor and Select a logo will be displayed to end-user when he will give the consent for the application to access to his data.
Url field corresponds to the web site where users can learn more about your application


3. Once done, click on “Next Page” button and insert your Reply Url. You can add up to 10 different endpoints with the “Add new reply URL” button

Reply Url field redirect users back to your application during the authorization process. This corresponds to Oauth2 standard flow.

Important

When your application requests authorization to access a user’s data, it includes a redirect_uri parameter in its query string. To authorize your application, this value must match EXACTLY  the URL you have provided in the Reply Url field, including any trailing slashes.

Step 2 : Check scopes

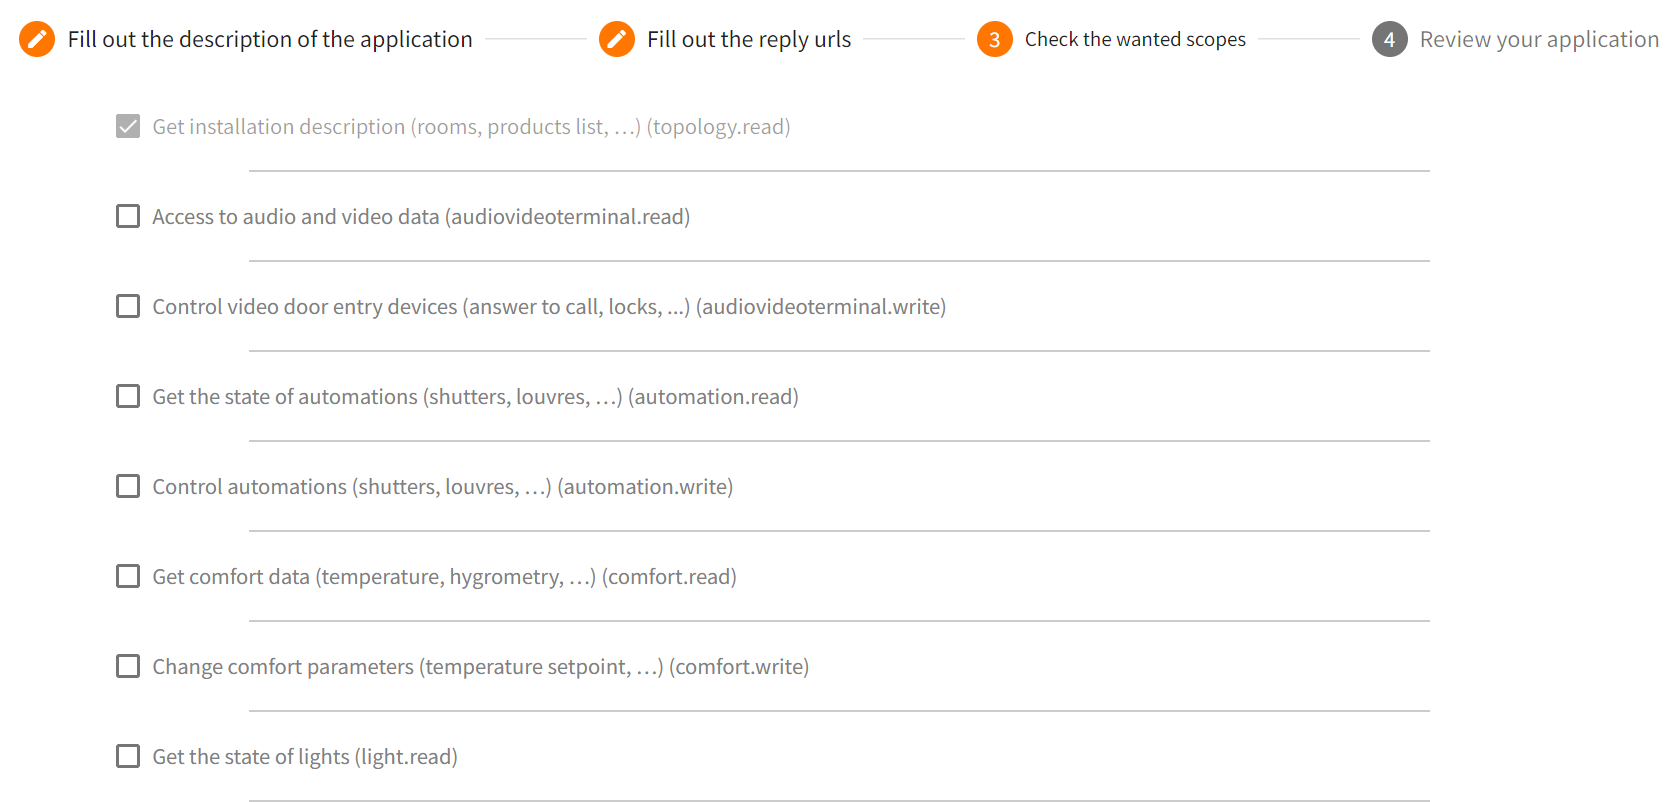
Before validating the application, you also need to specify which scope you need to use with your application:

Required scopes are  detailed in each API description

Click on “Next Page” and verify if all information are correct. Finally, click on “Validate” to create your application

Step 3 : Getting application details

After the creation of your application you are redirected to its details where you will find your client_id and client_secret. An email with these information will also be sent to you

Important

You absolutely need to keep the generated client_secret value. It CANNOT BE SENT BACK TO YOU

Nota

If needed, you can generate a new client_secret value and delete old ones

OAuth2 end-point url

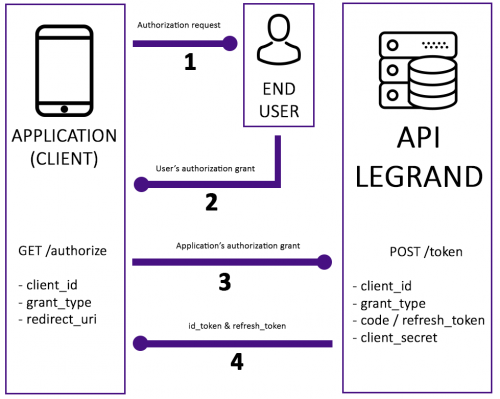
Our authentication mechanism is a standard Oauth2 one. It follows Oauth2 standard and a lot of documentation can be found on internet. For example, you could find documentation on Microsoft site.


You can see here a simple sequence diagram:

Step 1 : Authorization end-point

Request

This flow must be done only once, during account linking. After that, you must use /token flow periodically to get and refresh access_token.

Nota

You can find the different endpoints at the following URL : https://partners-login.eliotbylegrand.com/[client_id]/.well-known/openid-configuration

Make a GET request to:

https://partners-login.eliotbylegrand.com/authorize

With the following parameters in query string:

Parameter namePresenceValue
client_idmandatoryClient_id received by mail
redirect_urimandatorySpecified redirect_uri (exactly the same)
response_typemandatoryValue is “code”
staterecommendedA value included in the request that is also returned in the token response. A randomly generated unique value is typically used for preventing cross-site request forgery attacks

Example of request:

https://partners-login.eliotbylegrand.com/authorize?client_id=7700d7f4-b48e-4452-b493-5d14b45ef47e&response_type=code&state=d8cdccaa-0c37-4493-ab37-d5d92bc99cd7&redirect_uri=https://www.mycompany.com/callback/

Answer

The server returns a code, used with the token end-point.

Step 2 : Token end-point

This end point is used to get and refresh the access_token.

Request

To get the access_token (which must be add to the request each time you call an API), you must make a POST request to:

https://partners-login.eliotbylegrand.com/token

With the following parameters in the body:

Parameter namePresenceValue
client_idmandatoryClient_id received by mail
grant_typemandatoryValue is “authorization_code”
codemandatoryValue is the code you retrieve from the /authorize flow before
client_secretmandatoryclient_secret received by email

Answer

The server returns a JWT, containing at least the following elements:

  • An access_token: used each time you use an API for authorization (valid one hour)
  • refresh_token: used to refresh the access token before its expiration (valid 90 days)

Step 3 : Refresh token flow

As the access_token is valid one hour, you must refresh it regularly.

Request

Make a POST request to:

https://partners-login.eliotbylegrand.com/token

With the following parameters in the body:

Parameter namePresenceValue
client_idmandatoryclient_id received by mail
grant_typemandatoryValue is “refresh_token”
refresh_tokenmandatoryValue is the refresh_code you retrieve from the /token flow described just before or from this flow
client_secretmandatoryclient_secret received by email

Answer

As from the preceding flow, the server returns a JWT, containing at least the following elements:

  • An access_token: used each time you use an API for authorization (valid one hour)
  • refresh_token: used to refresh the access token before its expiration (valid 90 days)


The received refresh_token changes at each request. In order to be valid lifetime, you have to use the new generated refresh_token code to refresh your access_token.

Nota

If there is no connection to your application during more than 90 days, your token will expire and you will have to renew your Oauth2 token flow

Possible errors you can get when using authorization flow

Error codeNameDescriptionPossible solution
400invalid_requestThe request is malformed, a required parameter is missing or a parameter has an invalid valueCheck all your parameters and their spelling
unauthorized_clientThe client is not authorizedCheck your client_id parameter
access_deniedThe resource owner denied the request for authorizationCheck if your authentication information match with your Works With Legrand account
unsupported_response_typeUnsupported response typeCheck your grant_type parameter
invalid_scopeThe scope is malformed or invalidIf you defined custom scopes, check if they are valid  or well spelled
server_errorThe authorization server encountered an unexpected condition that prevented it from fulfilling the request. This error code is needed because a 500 Internal Server Error HTTP status code cannot be returned to the client by an HTTP redirect.Check your parameters and the server status
temporarily_unavailableThe authorization server is not able to handle the requestCheck the server status and your parameters
401invalid_clientThe client_id doesn’t existCheck your client_id parameter
500server_errorAn unexpected server error occuredWait for the server to work again
/Could not get any responseThe server couldn’t send a responseEnsure that the server is working properly
Check if you misspelled the server URL

Create an application using Postman v6.1.3

Postman is a development software dedicated to APIs and easy to use. We advise you to try it in order to understand how Eliot APIs works. This tutorial will focus more especially on the OpenId Connect Standard (OIDC) based on Oauth2 authentication process which is mandatory to build your application

Important

You need to have already created a developer account to follow this step by step tutorial. Also, you need to have subscribed to the Starter Kit and created your application. If it is not done yet, follow our Getting started and Create an application tutorials first.

Step 1 : Download and install

Step 2 : Launch

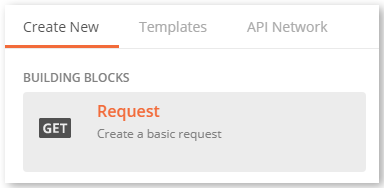
  • Once you have launched the program, click on “Request, create a basic request”
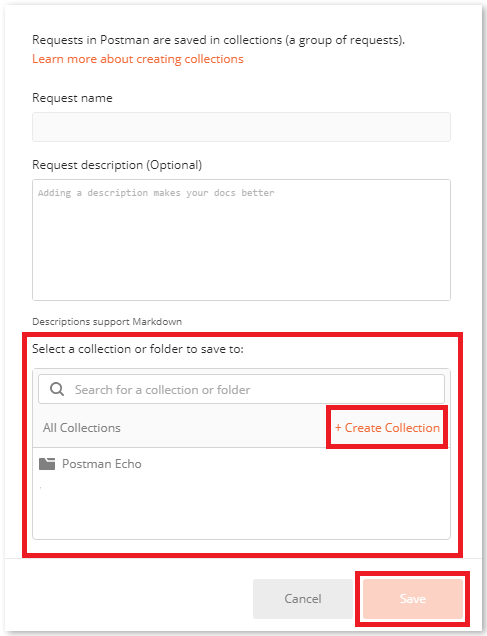
  • Fill up the required fields and click on “Create collection” or choose an available collection

Step 3 : Authorization flow

The first request you will need to send is a GET one for authorization:

https://partners-login.eliotbylegrand.com/authorize

 You will have to fill in 3 mandatory parameters in query string :

  • client_id : it’s the Application ID you received by email when your API was approved
  • response_type : value is “code”
  • redirect_uri : it is the “Reply Url” you specified at the creation of your API. You can recover it in your account at the “Details” section of your application. It must be EXACTLY the same (don’t forget the trailing slashes if specified). It corresponds to the page you want your end-users to be redirected to. For tests it can just be a placeholder : it doesn’t need to redirect to a true website

Other parameters are optional :


You can see below what your request must look like :

Nota

You can try different parameters by activating/deactivating them through a checkbox

Your GET request must look like this one :

Nota

If all of your parameters are correct, you will get a “Status: 200 OK”. If you receive an error code, please refer to the error code table

Now, open your internet browser and copy/paste the generated URL, then press “Enter”. (You possibly have to log yourself in one more time).

Finally, you will obtain a code to use in the next step to get the access_token.

Step 4 : Collect your access tokens

Token’s goal is to keep confidential the transit and storage of information between the API and the end-user. It is mandatory to use tokens in the Oauth2 authentication process. The lifetime of a token is 3600 seconds (1 hour) and a refresh token is 7776000 seconds (90 days). Let’s see how to collect them.


Go back to Postman and click on the “+New” button in the upper left corner.

Create a new Request like you did on “Step 2 : Launch”.

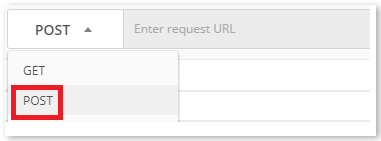
This time, choose “POST” method in the drop down menu.

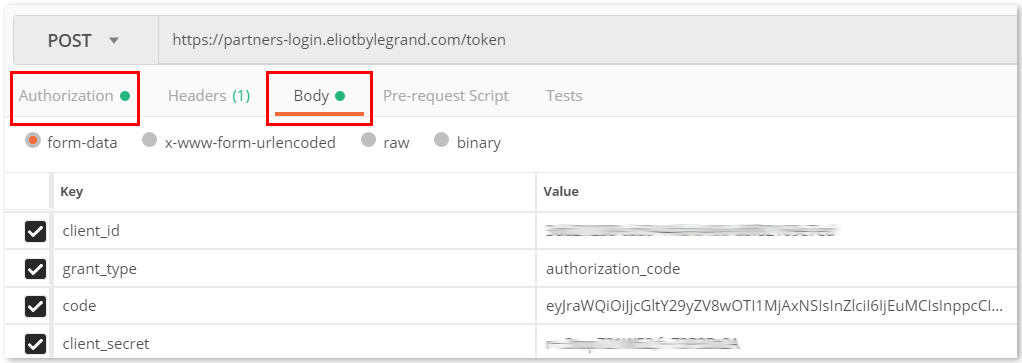
This request is a POST one for the token generation:

https://partners-login.eliotbylegrand.com/token

You will have to fill in 4 mandatory parameters in the body :

  • client_id : it is the Application ID you received by email when your API was approved
  • grant_type : value is authorization_code
  • code : it is the code you obtained in your web browser at the end of “Step 3 : Authorization flow”
  • client_secret : you received it by email at the approval of your application

Important

You absolutely need to keep the client_secret you received by email. It CANNOT BE SENT BACK TO YOU

You can see below what your request must look like:

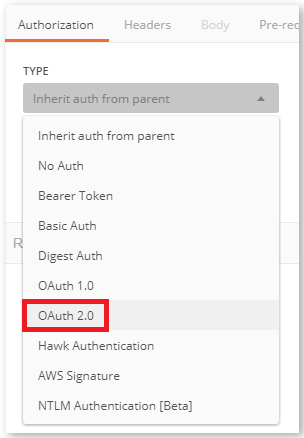
In the “Authorization” tab and under “TYPE”, choose “OAuth 2.0” in the drop down menu.

Press “Send button”

You are redirected to a sign-in popup. Just enter the login and password of your developer account.

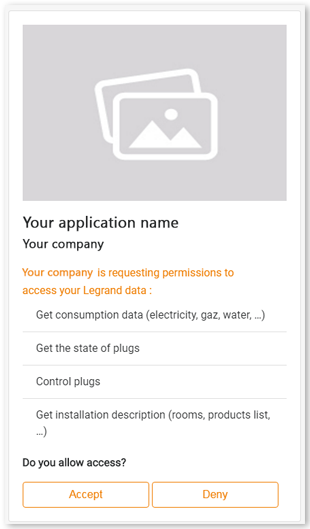
Your developer account is also an end-user one. As a user, you need to give the permission to the API to access some kind of data. It must be accepted by the end-user in order to use the application.

Nota

If you update your application with new scopes, they will have to be reaccepted by the end-user.

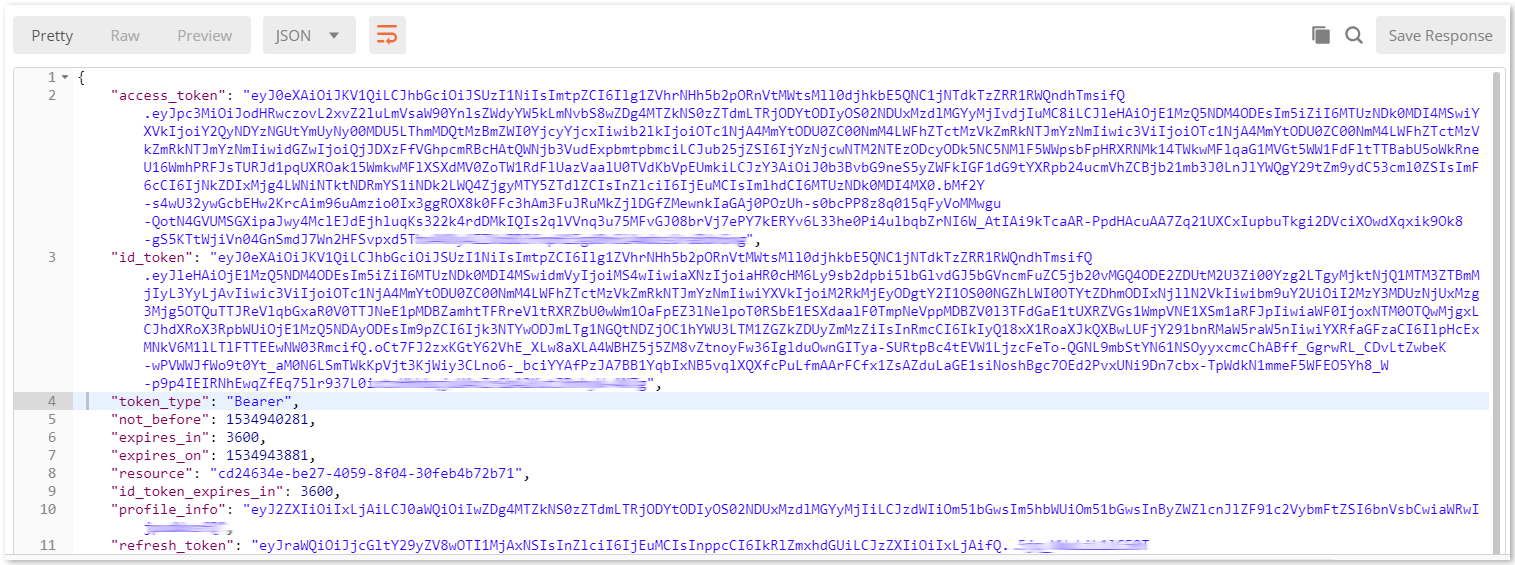
Once the user consents accepted, you can access to your token’s information:

  • Access Token
  • Token Type
  • id_token and its expiration time
  • resource
  • refresh_token and its expiration time

Step 5 (optional) : Manually verify a token

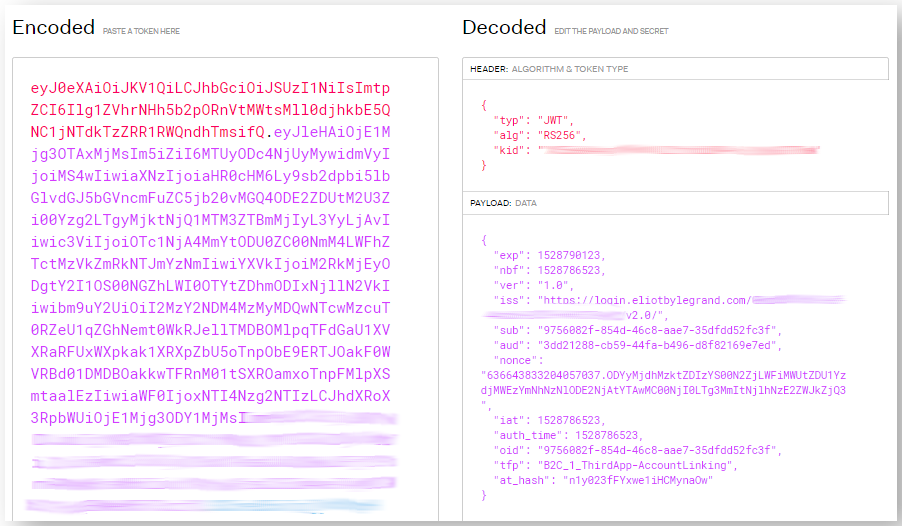
You can check information contained in an id_token to be sure that he is valid.

  • Connect on jwt.io
  • Copy/paste the id_token that can be found in “Manage Access Token”
  • Choose the RS256 algorithm

Nota

You can find here more documentation about the decoded information

Step 6 : Refresh_token flow

The refresh_token is used to obtain a renewed access token. Thanks to it, the user remain authenticated forever – he doesn’t have to log in at each connection


In Postman click on the “+New” button in the upper left corner.

Create a new Request like you did on “Step 2 : Launch” and “Step 4 : Collect your access tokens”.

Choose “POST” method in the drop down menu.

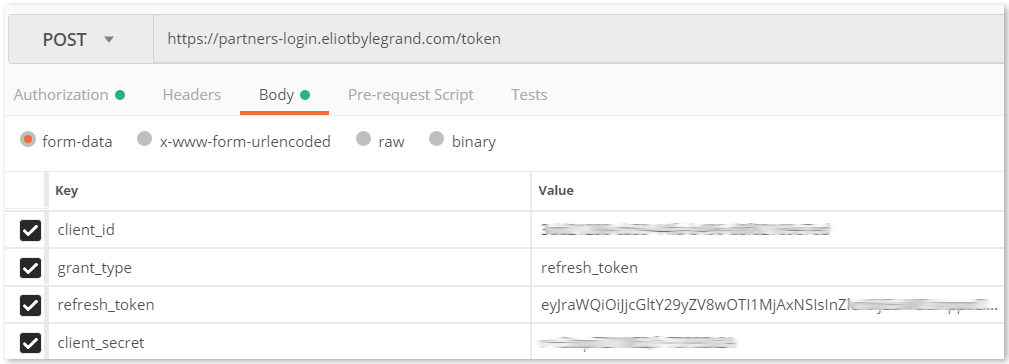
This request is a POST one for the refresh_token generation:

https://partners-login.eliotbylegrand.com/token

You will have to fill in 4 mandatory parameters in the body :

  • client_id : it is the Application ID you received by email when your API was approved
  • grant_type : value is refresh_token
  • refresh_token : it is the refresh_token code you retrieved from the token flow described just before
  • client_secret : you received it by email at the approval of your application


You can see below what your request must look like :

Step 7 (Optionnal) : Run your collection

Running your collection allows you to check if your requests worked and gives you an aggregate summary of what happened.


In the upper right corner of each 3 request you created, click on “Save” button.

Then, click on “Runner” in the upper left corner.

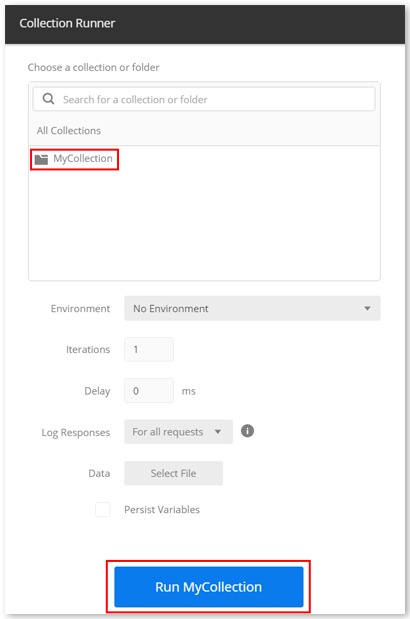
Choose the collection containing your 3 requests in the list and click on “Run {YourCollectionName}”

The result must look like the following

A Status 200 OK means that the requests successfully worked.

Nota

If you get a ”400 Bad request” error in order of a “200 OK”, check your parameters. It can be caused by an incorrect code in the token flow or an incorrect refresh_token code in the refresh_token flow

You can also add scripts to your requests. In the following example, the script tells you if you received a 200 OK response or something else.

In each of your requests, click on “Tests” and copy/paste the following script

tests[“status code is 200 : OK”] = responseCode.code === 200;

Subscription to Cloud to Cloud notifications (C2C webhooks)

This tutorial will deal with the configuration of a webhook for Smarther – v2.0 API. Webhooks allows you to subscribe to events. You can store your data on the endpoint you defined and, once the webhook triggered, getting notified when an event occurs

Prerequisite

Important

  • Only HTTPS webhook endpoint request are supported
  • Your Ocp-Apim-Subscription-Key is personal and must remain confidential

Send a webhook registration and subscription request

To register your webhook URL and subscribe to device events for a specific plant, the application must perform a POST HTTPS request to the following URL:

https://api.developer.legrand.com/smarther/v2.0/plants/{plantId}/subscription

With the following information in the header:

NameDescription
Content-TypeValue is : “Application/json”
Ocp-Apim-Subscription-KeySubscription key which provides access to this API. Found in the page My Subscriptions
AuthorizationOAuth2 access_token retrieved from your refresh token flow

With the following parameters in the body:

{
“EndPointUrl”: “<webhookUrl>”
}

Possible values of change

ValueExplanationC2C notification examples
FunctionCurrent thermostat function{
“chronothermostats”: [{
“function”: “HEATING”,
“mode”: “MANUAL”,
“setPoint”: {
“value”: “19.1”,
“unit”: “C”
},
“programs”: [{
“number”: “1”
}],
“activationTime”: “2019-11-17T02:00:47Z”,
“temperatureFormat”: “C”,
“loadState”: “INACTIVE”,
“time”: “2019-01-24T15:30:20Z”,
“thermometer”: {
“measures”: [{
“timeStamp”: “2019-01-24T15:30:19Z”,
“value”: “24.6”,
“unit”: “C”
}]
},
“hygrometer”: {
“measures”: [{
“timeStamp”: “2019-01-24T15:30:19Z”,
“value”: “24.6”,
“unit”: “%”
}]
},
“sender”: {
“addressType”: “AddressLocation”,
“system”: “thermoregulation”,
“plant”: {
“id”: “b5e48d6f-cbad-2711-e053-27182d0ad74c”,
“module”: {
“id”: “1ee68d6f-46b7-8f11-e053-27182d0a846a”
}
}
},
“receiver”: {
“oid”: [“a122e653-53fb-450e-b000-d47659807585”]
}
}]
},
ModeCurrent thermostat working mode
Setpoint temperatureCurrent thermostat setpoint temperature, if working mode is not boost
Program numberCurrent thermostat active program number, if working mode is automatic
Activation timeDate and time to which current working mode will be maintained
Load stateCurrent thermostat load state
Measured temperature / humidityOperation used to retrieve the measured temperature and humidity detected by a chronothermostat

Warning

  • If a webhook doesn’t reply, a retry will be sent following this schedule: 10 seconds, 30 seconds, 1 minute, 5 minutes and 10 minutes
  • All events not delivered in a period of 24 hours are considered has expired and will not be delivered
  • A user can have several webhooks for the same plant (number of webhooks allowed could change over the time)
  • A webhook can be banned if it doesn’t respond in less than 750ms or respond with a code >= 300. In this case, we increment a failure counter. After 20 failures, we count 1 error for your endpoint and ban it for a total of minutes calculated as following: 1 minute * set of 20 failures (i.e. : 200 failures = 10 minutes ban). The maximum ban time is 20 minutes. All webhook changes that happened during this ban are lost and will not be sent

You didn't find an answer to your question ?