Postman is a development software dedicated to APIs and easy to use. We advise you to try it in order to understand how Eliot APIs works. This tutorial will focus more especially on the OpenId Connect Standard (OIDC) based on Oauth2 authentication process which is mandatory to build your application
Important
You need to have already created a developer account to follow this step by step tutorial.
Also, you need to have subscribed to the Starter Kit and created your application. If it is not done yet, follow our Getting started and Create an application tutorials first.
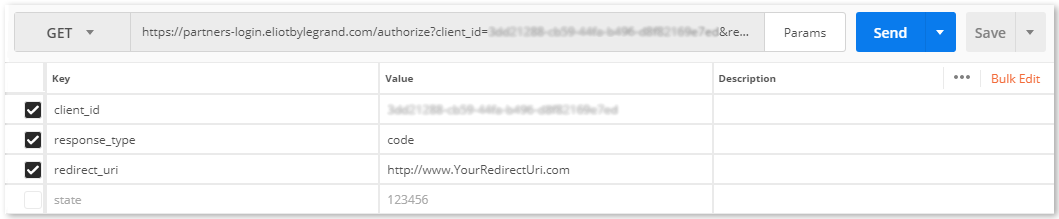
You will have to fill in 3 mandatory parameters in query string :
client_id : it’s the Application ID you received by email when your API was approved
response_type : value is “code”
redirect_uri : it is the “Reply Url” you specified at the creation of your API. You can recover it in your account at the “Details” section of your application. It must be EXACTLY the same (don’t forget the trailing slashes if specified). It corresponds to the page you want your end-users to be redirected to. For tests it can just be a placeholder : it doesn’t need to redirect to a true website
You can see below what your request must look like :
Nota
You can try different parameters by activating/deactivating them through a checkbox
Your GET request must look like this one :
Nota
If all of your parameters are correct, you will get a “Status: 200 OK”. If you receive an error code, please refer to the error code table
Now, open your internet browser and copy/paste the generated URL, then press “Enter”. (You possibly have to log yourself in one more time).
Finally, you will obtain a code to use in the next step to get the access_token.
Step 4 : Collect your access tokens
Token’s goal is to keep confidential the transit and storage of information between the API and the end-user. It is mandatory to use tokens in the Oauth2 authentication process. The lifetime of a token is 3600 seconds (1 hour) and a refresh token is 7776000 seconds (90 days). Let’s see how to collect them.
Go back to Postman and click on the “+New” button in the upper left corner.
Create a new Request like you did on “Step 2 : Launch”.
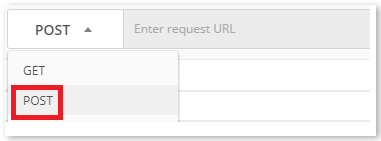
This time, choose “POST” method in the drop down menu.
This request is a POST one for the token generation:
https://partners-login.eliotbylegrand.com/token
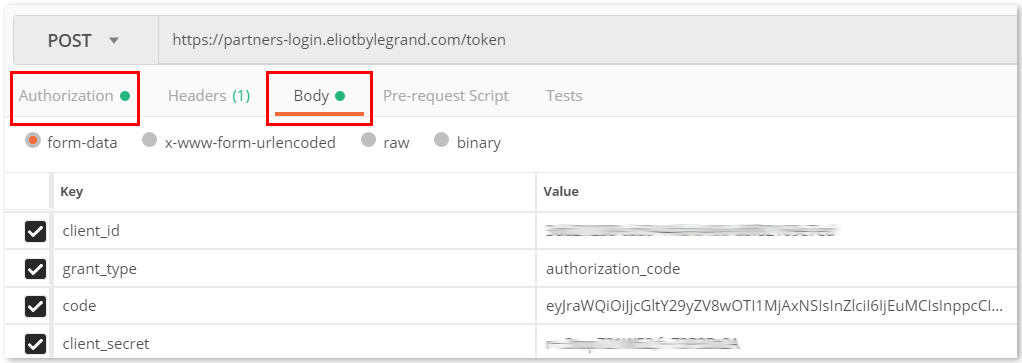
You will have to fill in 4 mandatory parameters in the body :
client_id : it is the Application ID you received by email when your API was approved
grant_type : value is “authorization_code”
code : it is the code you obtained in your web browser at the end of “Step 3 : Authorization flow”
client_secret : you received it by email at the approval of your application
Important
You absolutely need to keep the client_secret you received by email. It CANNOT BE SENT BACK TO YOU
You can see below what your request must look like:
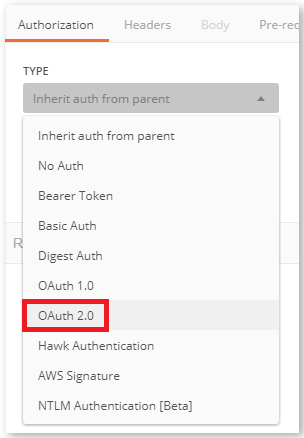
In the “Authorization” tab and under “TYPE”, choose “OAuth 2.0” in the drop down menu.
Press “Send button”
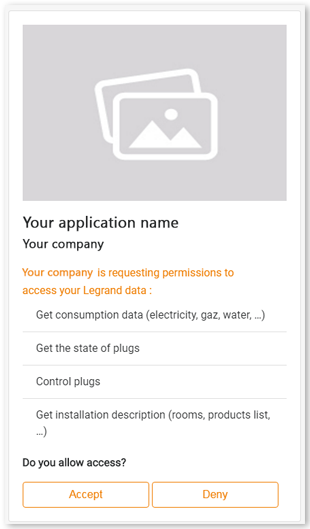
You are redirected to a sign-in popup. Just enter the login and password of your developer account.
Your developer account is also an end-user one. As a user, you need to give the permission to the API to access some kind of data. It must be accepted by the end-user in order to use the application.
Nota
If you update your application with new scopes, they will have to be reaccepted by the end-user.
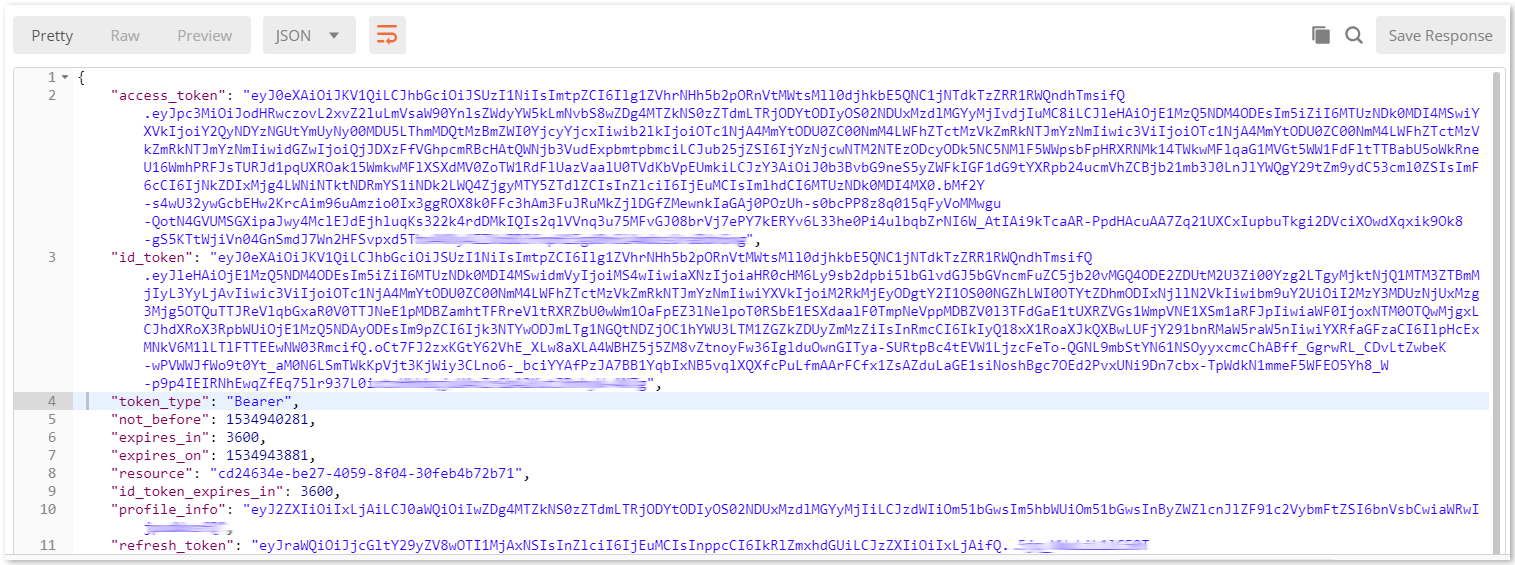
Once the user consents accepted, you can access to your token’s information:
Access Token
Token Type
id_token and its expiration time
resource
refresh_token and its expiration time
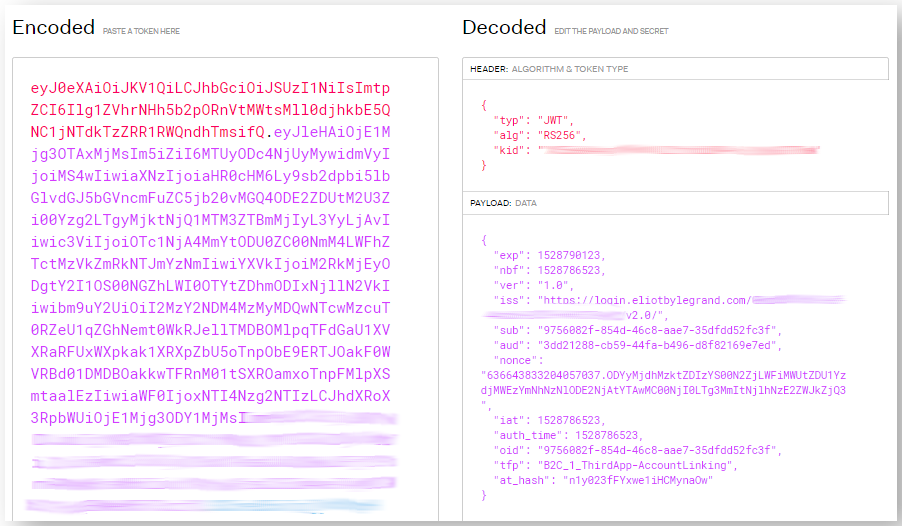
Step 5 (optional) : Manually verify a token
You can check information contained in an id_token to be sure that he is valid.
Copy/paste the id_token that can be found in “Manage Access Token”
Choose the RS256 algorithm
Nota
You can find here more documentation about the decoded information
Step 6 : Refresh_token flow
The refresh_token is used to obtain a renewed access token. Thanks to it, the user remain authenticated forever – he doesn’t have to log in at each connection
In Postman click on the “+New” button in the upper left corner.
Create a new Request like you did on “Step 2 : Launch” and “Step 4 : Collect your access tokens”.
Choose “POST” method in the drop down menu.
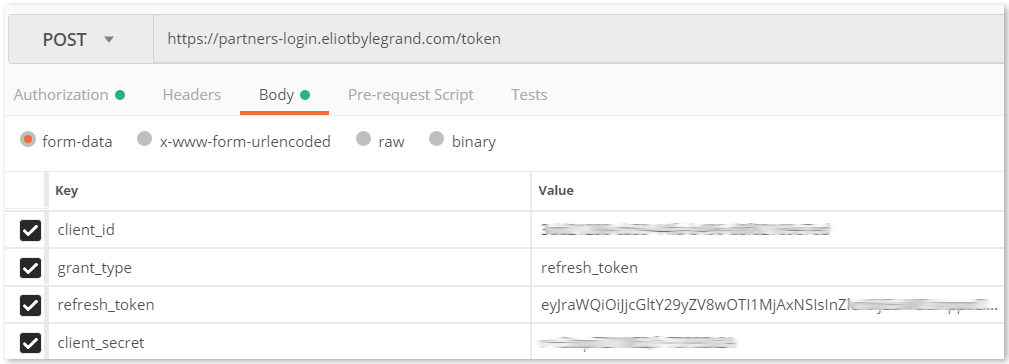
This request is a POST one for the refresh_token generation:
https://partners-login.eliotbylegrand.com/token
You will have to fill in 4 mandatory parameters in the body :
client_id : it is the Application ID you received by email when your API was approved
grant_type : value is “refresh_token”
refresh_token : it is the refresh_token code you retrieved from the token flow described just before
client_secret : you received it by email at the approval of your application
You can see below what your request must look like :
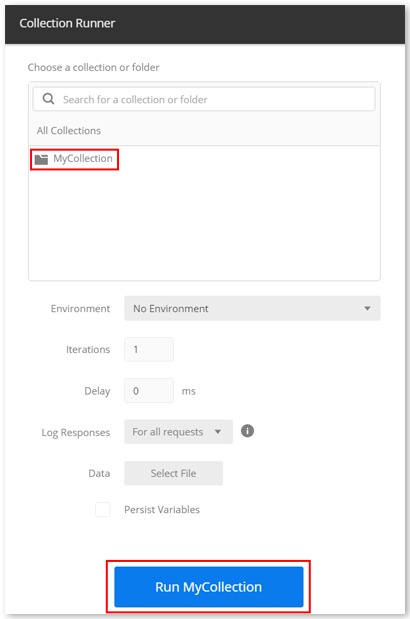
Step 7 (Optionnal) : Run your collection
Running your collection allows you to check if your requests worked and gives you an aggregate summary of what happened.
In the upper right corner of each 3 request you created, click on “Save” button.
Then, click on “Runner” in the upper left corner.
Choose the collection containing your 3 requests in the list and click on “Run {YourCollectionName}”
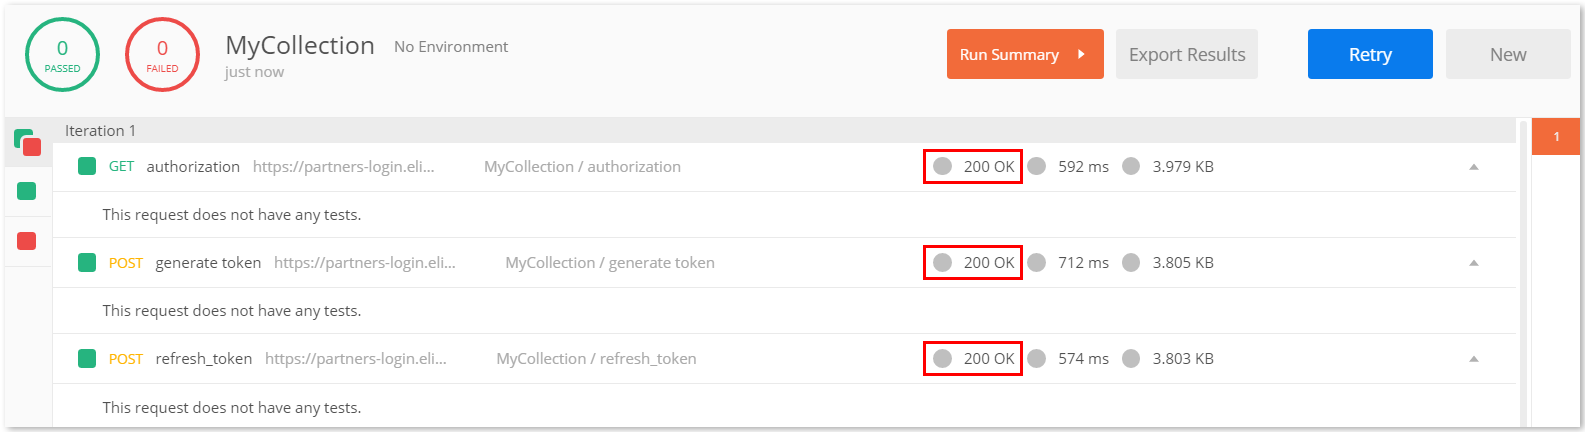
The result must look like the following
A Status 200 OK means that the requests successfully worked.
Nota
If you get a ”400 Bad request” error in order of a “200 OK”, check your parameters. It can be caused by an incorrect code in the token flow or an incorrect refresh_token code in the refresh_token flow
You can also add scripts to your requests. In the following example, the script tells you if you received a 200 OK response or something else.
In each of your requests, click on “Tests” and copy/paste the following script
tests[“status code is 200 : OK”] = responseCode.code === 200;